
Now let's check about the internal upgrades available to the macOS server 2011. In a nutshell, only the RAM and the internal storage from this model can be user upgradeable.
This series of posts are related on transforming this old Mac Mini from 2011 into a ‘new' and useful macOS Server 2011. If you are new to this topic, check out the first post. For more posts about this topic, please follow this link.
Table of Contents
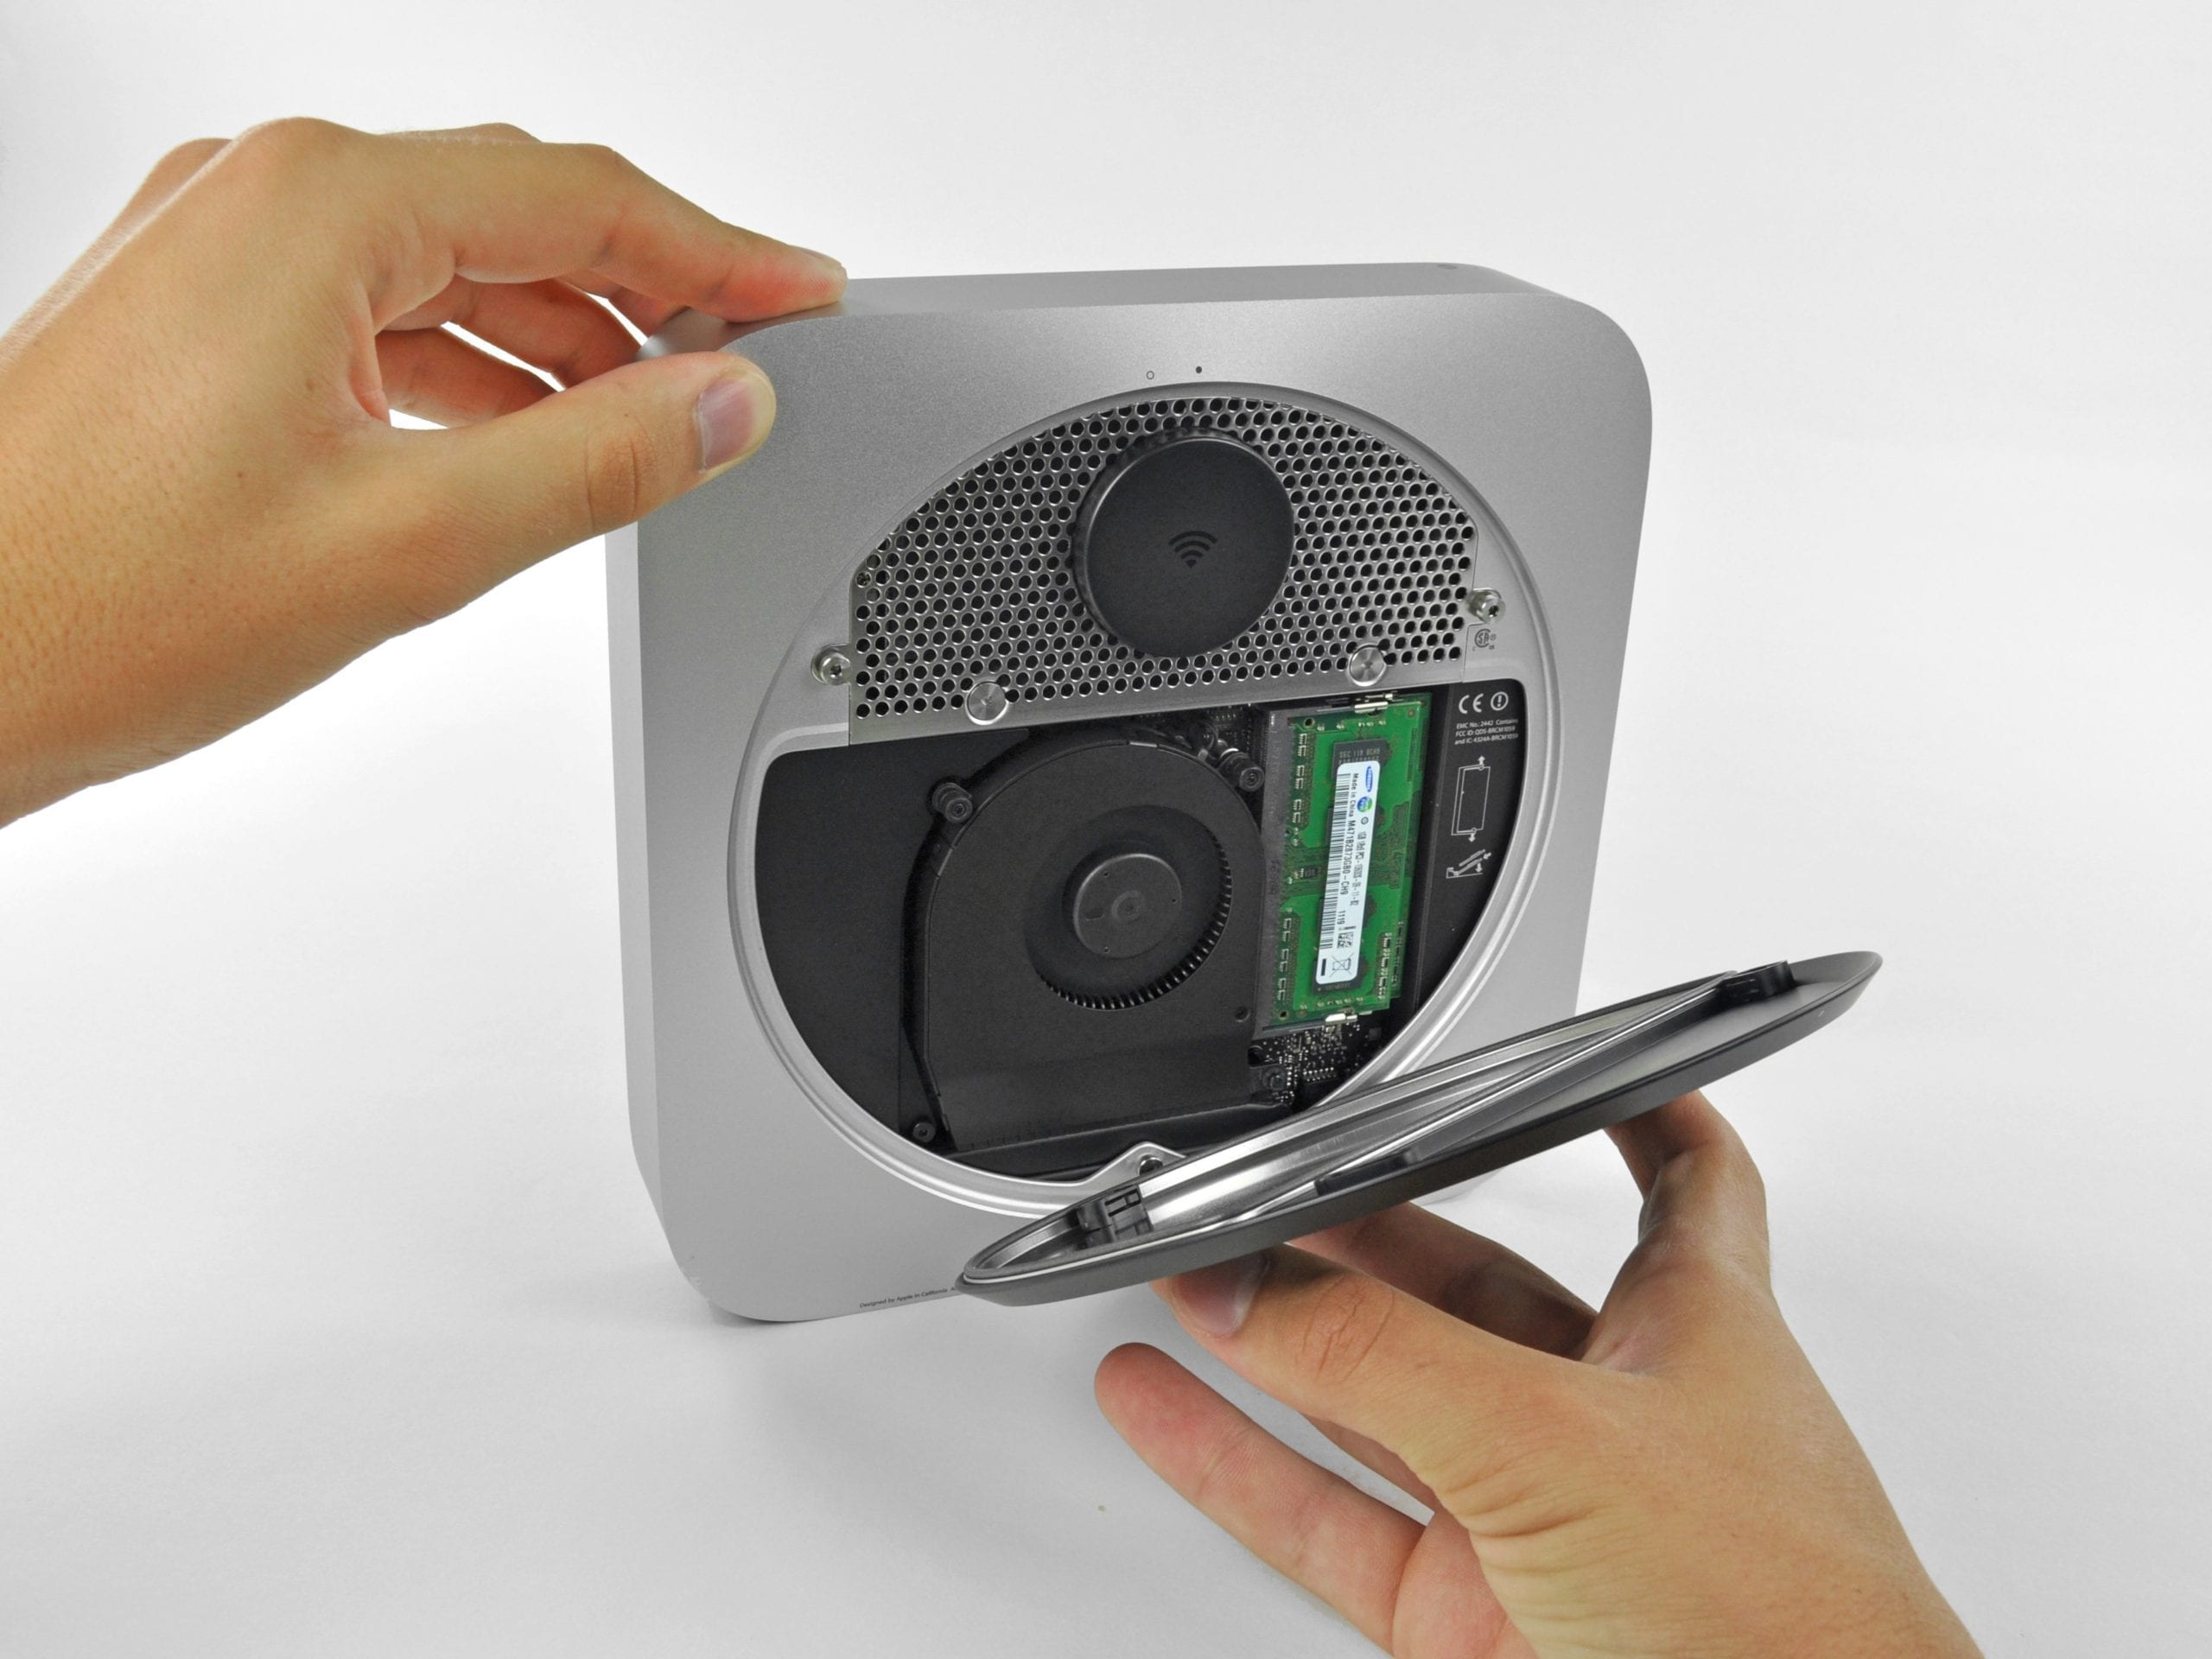
Internal Upgrades Available
This desktop computer is one of the few Macs that can be user upgradable. This means of course money savings but above all, customize the machine depending on your needs. In my opinion, this reason has a higher weight by itself.
Check out the videos upgrades here:

Fortunately, there is a tool in the website Other World Computing that will tell me exactly what you can upgrade in my Mac Mini:

Internal Storage
This 2011 Mac Mini has 2 SATAIII ports, which means the macOS server can hold up to two 2.5″ hard drives. The maximum capacity overall is 4TB.
However, you can't just ‘connect' the internal hard drives with a standard SATAIII data cable. What is needed for this upgrade, is a Mac Mini flex cable that you can get from OWC. As you will see later, it's a different connector.

Which setup?
Previously, I wrote about different kinds of storage for home servers, as well as arrays and options. If you are not familiar with the terminology, please click in the link below.
Buy Internal Storage as you need.
It is no mystery that prices of storage drops over time. Do you remember how much did the 1GB hard drives used to cost? Therefore, don't buy excess of internal storage to future-proof the macOS Server 2011. Click below to read these articles about price drops of SSD and HDD through time.
Which Internal Storage option fit best in this server?
HDD+HDD
With this configuration, you can have lots of storage; The 2011 Mac Mini can only have up to 4TB. Among the other options, it will be the most economical.
However, its main disadvantage is its low speed. If you are looking the macOS Server responds quickly, then you should opt for a configuration with SSD.

SSD+SSD
The fastest of all configurations. You will find that all the applications on the computer will feel more responsive.
However, the cost will be higher. If you can afford it, go ahead. Check it out here a list of storage drives in OWC.

SSD+HDD
It will allow you to mix the best of both worlds. On the SSD are stored the files or programs that need to be accessed quickly, while on the HDD are stored the files which delay will not affect the computer.

How fast can it be?
According to this page of OWC. Solid State Drives (SSD) are 92x faster than Magnetic Hard Drives (HDD). SSDs can write data up to 559MBps while HDDs can only write up to 75MBps.
The Mac Mini 2011 has 2 SATAIII ports, allowing communication with storage drives up to 6Gbps. This is faster than the included ports USB 2.0 (480Mbps) or FireWire 800 (786Mbps). Only the Thunderbolt 1 port (10Gbps) can exceed that speed. If you need speed, then it has to be internal.
My Choice
After inspecting among the options for speed and storage solution, the SSD + HDD option is chosen to build the macOS Server 2011. The SSD will execute the macOS operating system due its unrivaled speed, as well as other files. The HDD will store other files that we can afford less speed.
- SSD: Sandisk 256GB U100.
- HDD: Toshiba 1.0TB MQ04AB Series Hard Disk Drive (HGST isn't available at the time of this writing).
Alternative
If you chose for dual HDD or SSD, then setting RAID (either RAID 0 or 1) will be tremendously useful.
For creating a RAID storage solution, you will need to use the Disk Utility app in macOS. Check out this step-by-step instructions page written by Apple.
RAM or Computer Memory
This Mac Mini can be upgraded up to 16GB of RAM in total. It holds two SO-DIMM modules of 204 pins. It came originally with 2GB but nowadays this quantity falls short.

16 GB of RAM isn’t expensive anymore and the macOS Server could run more programs or services in the background. I chose this option from OWC but you can buy from any other store, as long as the specifications are equal.
Hardware Upgrade
Upgrading took around 50 minutes to complete. I had to took away almost the entire computer!! But fortunately the instructions (detailed below) were clear.


Memory Modules
First, the 2 modules of 8GB of RAM each. The following video from OWC explains step-by-step how to upgrade the RAM.
Hard Drive
In this video from OWC explains about replacing the existing hard drive of the Mac Mini with 2 extra drives. This Mac Mini will be updated with:
Just to make sure
In this post, I installed macOS in the server. I wanted to make sure that the storage and memory are detected by the server. Click on the Apple icon and click on About this Mac. After checking the Storage and Memory tab, I'm now sure that everything works as expected.


Moving Forward, I/O Ports
In the next blog post, I will make a overview about the ports in the Mac Mini 2011, essential to understand the capabilities of the macOS Server 2011.
techZorro's Index of Content
Keep Reading!
- 007 – The outstanding Internet Protocol Layers and its hidden way to work
 Which protocols are used in internet? This episode talks about TCP/IP or Internet Protocol Layers required to work. Click here to listen.
 - 003 – Wi-Fi vs Ethernet, Convenience vs Reliability?When should a wired or wireless network be used? Let's discuss the differences between Wi-Fi and Ethernet. Click here to listen.
- The outstanding Internet Protocol Layers and its hidden way
 What is Internet Protocol or TCP/IP and how does it work? The Internet Protocol Layers are explained in this post. Click here to read.
 - Ethernet vs Wi-Fi
 When should a wired or wireless network be used? This post presents a brief comparison of Ethernet vs Wi-Fi. Click here to read.
 - Optical Media for the macOS Server 2011
 Build your media entertainment solution with optimal media and a Mac Mini. CD, DVD and Blu-ray discs are covered. Click here to read more.
You have reached this far!
Thank you for reading the blog post. Your comments and suggestions are welcomed. At the bottom of this page, leave a message or just say hi! The whole team of techZorro will appreciate it. Don't forget to share it on social media as well.
techZorro’s Index of Content
Click on the following link to browse likewise content in the blog in techZorro. This index will help you see what you are looking for in a bird’s eye view.
techZorro's Newsletter!
If you enjoyed this blog post, please subscribe to techZorro’s newsletter so you don’t miss any future blog posts!
[…] techZorro’s Blog Internal Upgrades for the macOS Server 2011 […]
[…] Internal Upgrades for the macOS Server 2011 […]
[…] the upgrading from the internal components of the Mac Mini, we can now begin installing macOS in the SSD located in the macOS Server 2011. The […]